In this post I will describe the steps to start creating load tests to your API or application, in Ruby, that will use Apache JMeter to run the tests and collect the metrics.
Why Apache JMeter
Because it’s open source and can be scriptable to run in headless mode, avoiding
all the overhead GUI’s create, specially in an application written in Java.
Also, because it’s written in Java we can take advantage of the thread system, and
squeeze our machines to do more requests.
On Google, is one of the top results for HTTP load test software,
on Stackoverflow, when asking for a tool to perform stress tests on web application
it also came as the first suggestion.
Setup the base application to be tested
Instead of creating another useless blog application to perform the tests against it, I will use a code base I’m already familiar. My choice is Spree Commerce.
Get Spree up and running
I’m assuming that you have a working ruby system on your machine, if not install ruby, rubygems and bundler.
- Install Ruby on Rails:
gem install rails - Create a new Rails app:
rails new spree - Add Spree to the
Gemfile:gem 'spree', '~> 3.2.0' gem 'spree_auth_devise', '~> 3.2.0.beta' gem 'spree_gateway', '~> 3.2.0.beta' - Install the dependencies:
bundle install - Run the migrations and seed data:
rails g spree:install - Press ENTER when asked for Email and Password, so they will be
[email protected]andspree123 - Start the application:
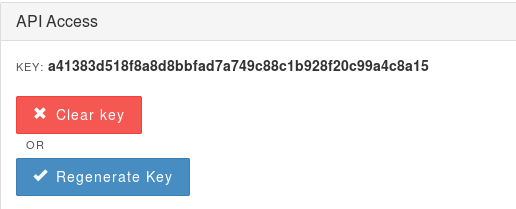
rails s - Go to your User Profile
- Get the API Key

- Do a trial request with cURL
curl --header "X-Spree-Token:a41383d518f8a8d8bbfad7a749c88c1b928f20c99a4c8a15" http://localhost:3000/api/v1/products.json
Install Apache JMeter
The fun part of Ruby is we’re using it for a DSL to create the Apache JMeter tests. The hard work is done by the ruby-jmeter gem from flood.io.
- Install Java (Yeah I know… life is not perfect!)
- Install Apache JMeter and make it available on your
$PATH. In my case I’ve saved the file on~/tmpand used~/binbecause it’s already in my$PATH - Download the
tgzfile from http://jmeter.apache.org/download_jmeter.cgi - Extract it:
tar -xzf apache-jmeter-3.1.tgz -C tmp - Link the binary:
ln -s ~/tmp/apache-jmeter-3.2/bin/jmeter ~/bin/jmeter - Execute ‘jmeter -v’ and check the output to confirm it’s working
- Install ‘ruby-jmeter’ gem with
gem install ruby-jmeter
Create and running tests
The first test I’ll write will be to mimic the request I’ve used with curl previously.
So in a load-test.rb file I will add:
1
2
3
4
5
6
7
auth_token = 'a41383d518f8a8d8bbfad7a749c88c1b928f20c99a4c8a15'
test do
  threads count: 10 do
    header({name: 'X-Spree-Token', value: auth_token})
    visit name: 'Products listing', url: 'http://localhost:3000/api/v1/products.json'
  end
end.run
Now you have a jmeter.jtl file you can use to see the results on Apache JMeter. To see the results
and explore ways to get the data visualization, you can add listeners to your test plan and
then load the jtl file.
Another option, is to instruct Apache JMeter to create a log with a summary of the tests. To do this
we need to create a jmeter.properties file and fill with the following content:
1
2
3
4
5
6
7
8
9
10
11
12
# Define the following property to automatically start a summariser with that name
# (applies to non-GUI mode only)
summariser.name=summary
#
# interval between summaries (in seconds) default 3 minutes
summariser.interval=180
#
# Write messages to log file
summariser.log=true
#
# Write messages to System.out
summariser.out=true
After creating the file add properties: 'jmeter.properties' to the run arguments in the test.
You can see more details in the summarizer documentation
After a second run you should be able to see the results in the log file:
INFO o.a.j.r.Summariser: summary +      4 in 00:00:02 =    1.8/s Avg: 10667 Min: 10308 Max: 11156 Err:     0 (0.00%) Active: 0 Started: 10 Finished: 10
INFO o.a.j.r.Summariser: summary =     59 in 00:01:09 =    0.9/s Avg: 10664 Min:  2053 Max: 12874 Err:     0 (0.00%)
Conclusions
With this Ruby DSL, it’s very easy to create a maintainable version of our load tests and still have the flexibility to control some outputs. Also, we can still use JMeter to draw some graphics if needed, like if we had specified all the tests in the JMeter itself. So we get the best of both worlds, first the ability to easily define our tests and second the power to use the same old tools to do the dirty job.
Disclaimer
I’m not affiliated with flood.io by any means, I mention them because I appreciate their work on the gem. Also, you don’t need any plan to run the tests on your machines, because the gem is open source. But if you need a cloud option for load tests, please take a look at their page.
